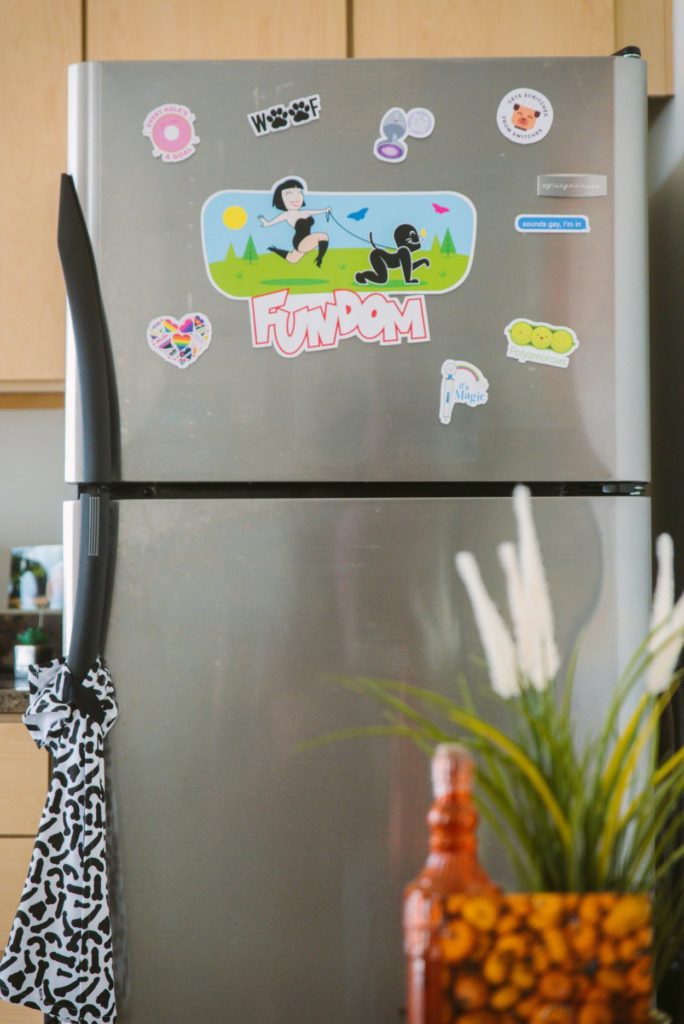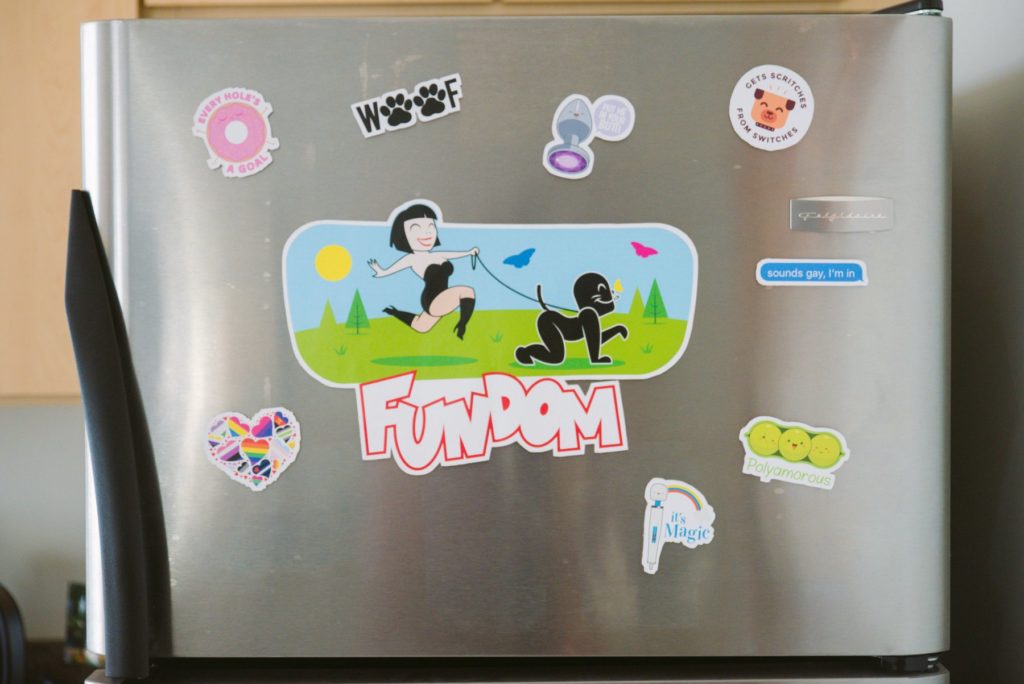
If you’ve met me, you know that sex and kink are a large part of my identity. This kinda checks out; I spend all day working in sex and writing kink education – and then I spend my weekends playing in that very same world. So it was frustrating to find out how difficult it is to find my own BDSM magnets.
I can find kinky stickers (and even those are a bit rare!), but finding magnets was even harder.
I get it: for small businesses, there are a lot more companies that do direct-to-business sticker printing at a lower price. Especially if you’re unsure how large of a market you’ll have, it’s a whole lot safer to bulk order $150 of stickers than $800 of magnets. I get it.
But it didn’t solve my problem: I wanted my house to be decorated with awesome BDSM magnets and art.
So I went my own route and figured out how to make your own BDSM magnets. And that’s exactly what I’m going to teach you today.
It’s surprisingly easy – and surprisingly cheap! You just need a bit of time, some magnets, and some stickers. The stickers were, by far, the most expensive part of this endeavor.
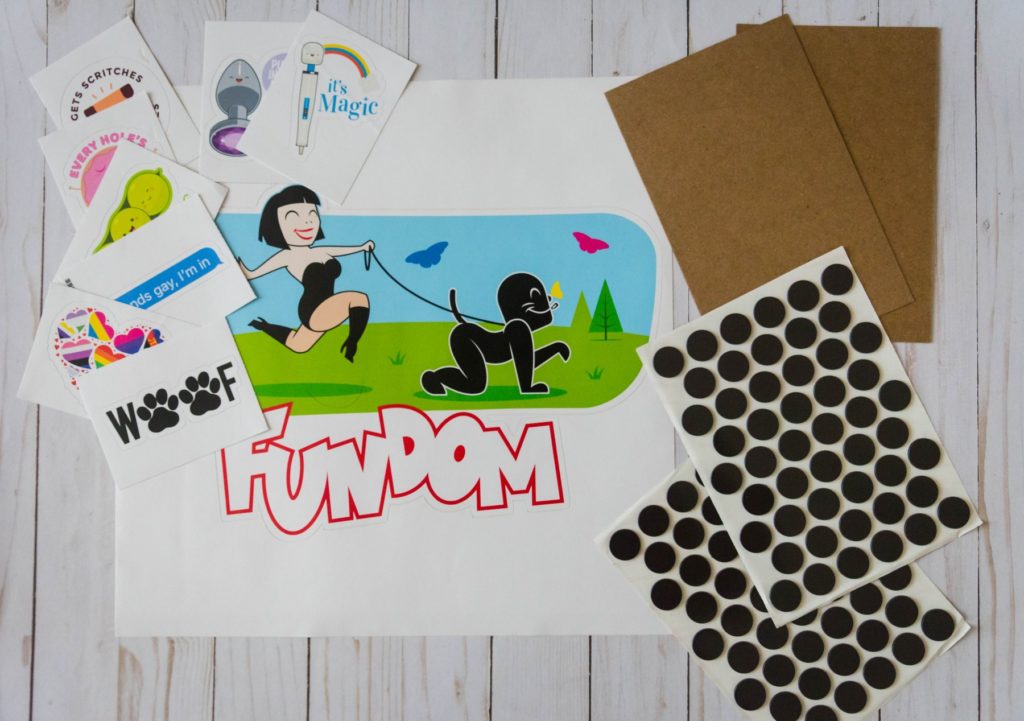
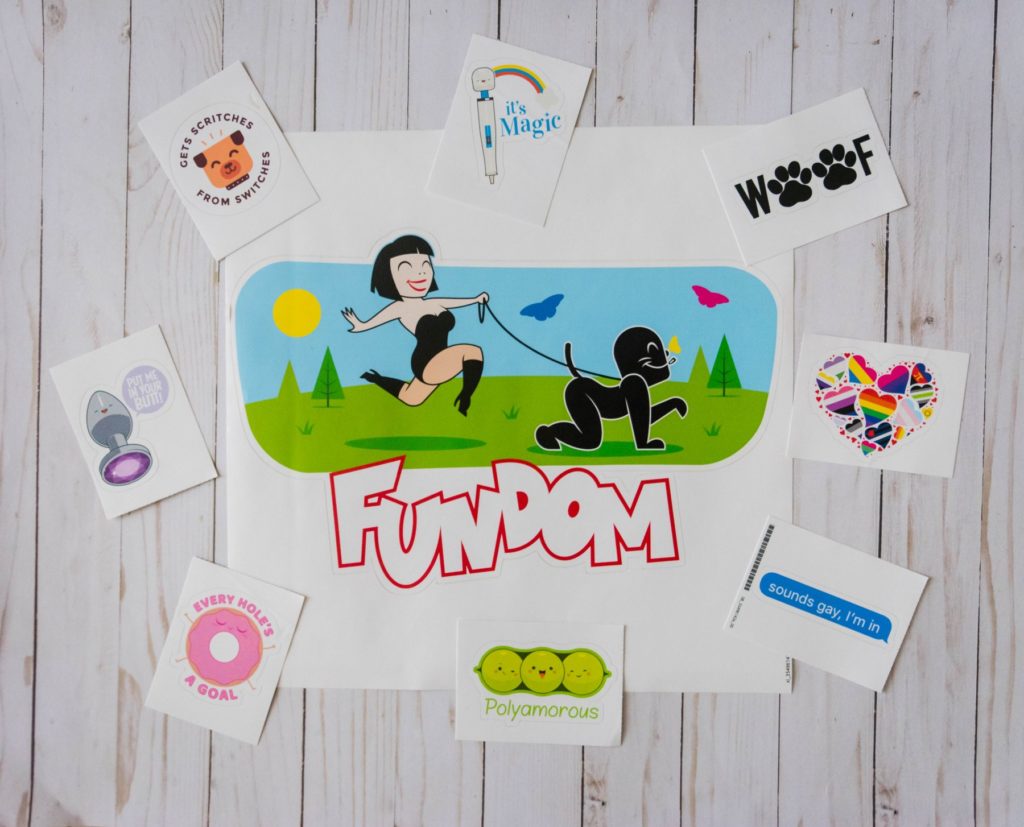
(penandkink [also on Twitter] has the majority of my love in this collection. All Pictured: Gets scritches from switches, Put me in your butt!, Every hole’s a goal [a personal favorite], Poly peas, It’s magic! wand, Fundom!, Woof!, LGBTQ pride heart, Sounds gay I’m in.)
How to Make Your Own BDSM Magnets: Necessary Supplies
To do this, you’ll need:
- A safe cutting surface
- As many stickers as you want to turn into magnets
- Thin cardboard (cereal boxes work great for this!)
- Boring magnets that have adhesive on one side (I got those!) – or regular magnets with a strong glue
- Xacto knife
Safety-wise, you’ll need to be able to make cuts with an Xacto knife without destroying your furniture or yourself. The cuts don’t have to be ultra-precise, but your resulting BDSM magnets will look better if they are.
DIY BDSM Magnets: An Overview
Honestly, this is simple as shit. It just takes a bit of time and precision.
We’re going to stick the stickers onto the thin cardboard, then we’re going to use the Xacto knife to cut around the sticker, leaving the sticker attached to the thin cardboard.
Then we’re going to glue the magnet into the backside of the thin cardboard.
And BAM! You now have a magnet that looks like a magnet.
As a fun bonus, they also have some “depth” to them because the magnet protrudes a bit, so they look really fancy on your fridge. (Like canvas art for your fridge).
Let’s talk details:
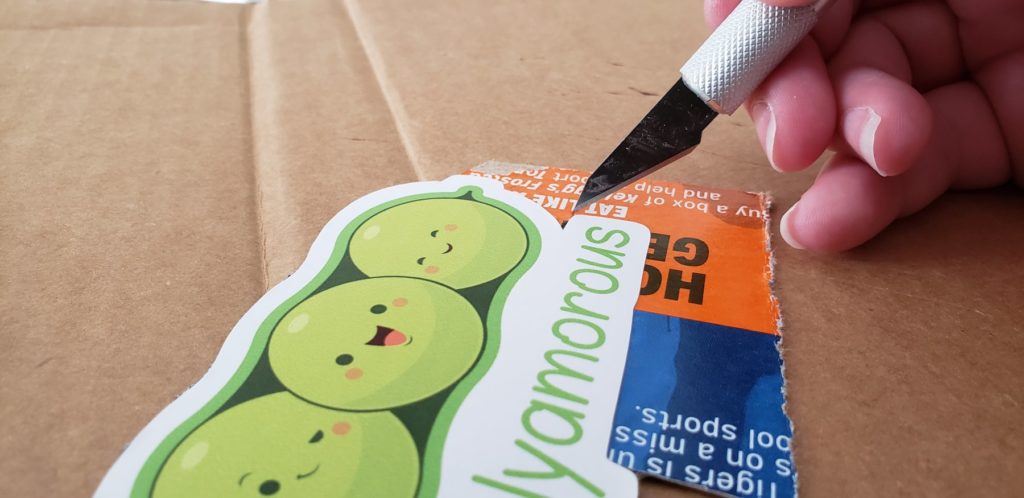
Place your Stickers
Lay your thin cardboard out flat on a cutting-safe surface. Then, stick your sticker onto that completely-flat cardboard. (If the cardboard isn’t completely flat, get another piece.)
I, literally, just cut off the large front and back panels of cereal boxes.
My small and medium stickers fit on there fine.
For gigantic stickers, I had to wait until we purchased an appliance. Most appliances come packaged in sturdy, thick brown cardboard (for appliance protection) that is surrounded by a box of thin, colorful cardboard. This thin, colorful cardboard worked great for my gigantic, foot-long sticker.
I recommend sticking your sticker to the colored side of the cardboard (if applicable). When you’re done, this will make the backsides of the stickers the boring brown or white cardboard color. You do you, though.
After your stickers are stuck to the cardboard, use scissors or your knife to do a rough cut around the sticker to separate it from the bulk of the cardboard.
Leave enough space around the sticker to hold it down. Separating it from the cardboard piece, at large, makes it easier to turn and handle as we’re cutting.
Cut Out the Sticker
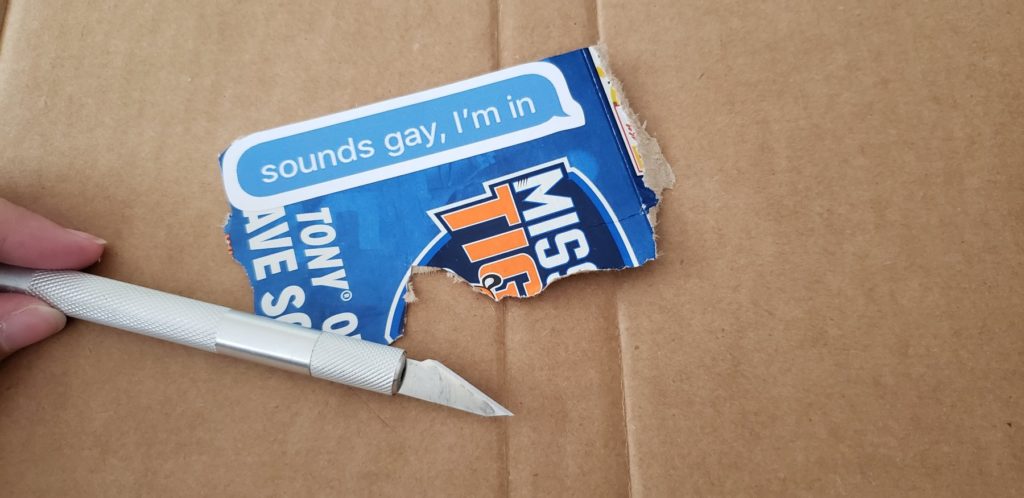
Now that your sticker is nicely adhered onto the cardboard, we’re simply going to use our Xacto knife to cut all of the excess cardboard away from the sticker.
I highly recommend a very sharp knife, so be very careful cutting – and ensure you’re cutting on a safe surface. I was cutting through two layers of extra-thick cardboard for my photos here. (…that were sitting on my lap, though. Can’t say I’d recommend that, but I’m not going to pretend to be a beacon of perfection here.)
Cut as close as you can to the sticker itself, following the same lines as the sticker. It’s a bit like Kindergarten when you used to cut out shapes.
Clean Up the Sticker
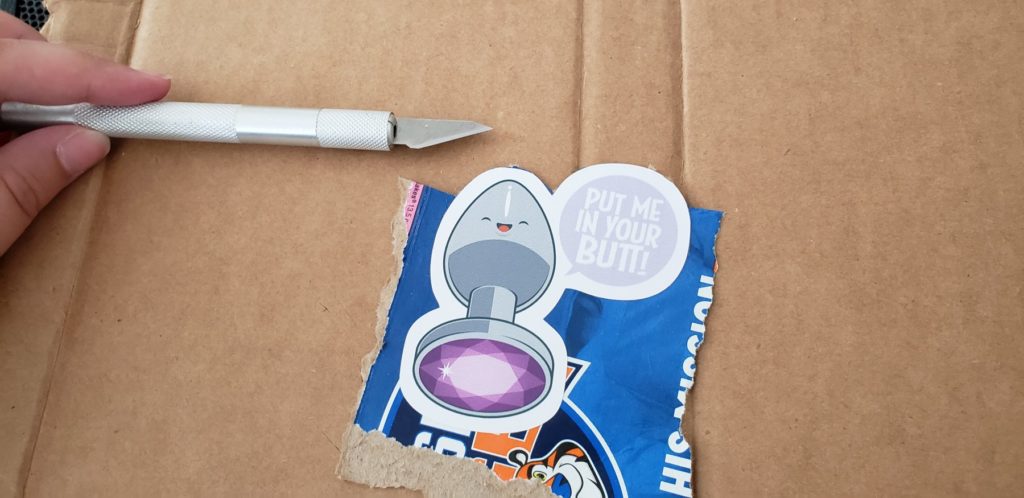
Even if you’re really precise, you’ll probably have a few areas around your stickers that have a bit of extra “fluff” from an uneven cardboard tear.
This is where you go through and make super precise, gentle cuts with your Xacto knife to remove any fluff and get the sticker looking as clean as possible.
In some cases, this might mean chopping off a little bit of the sticker border. It’s your life: have at it if that makes you happy. It’s about finding that balance between a clean-looking BDSM magnet and having the sticker entirely intact.
I definitely chopped off a bit of the borders on a few of my kinky stickers, and I’m not sure you can tell once they’re on the fridge.
Add the Magnet
You’re almost done! (Told you it’s easy!)
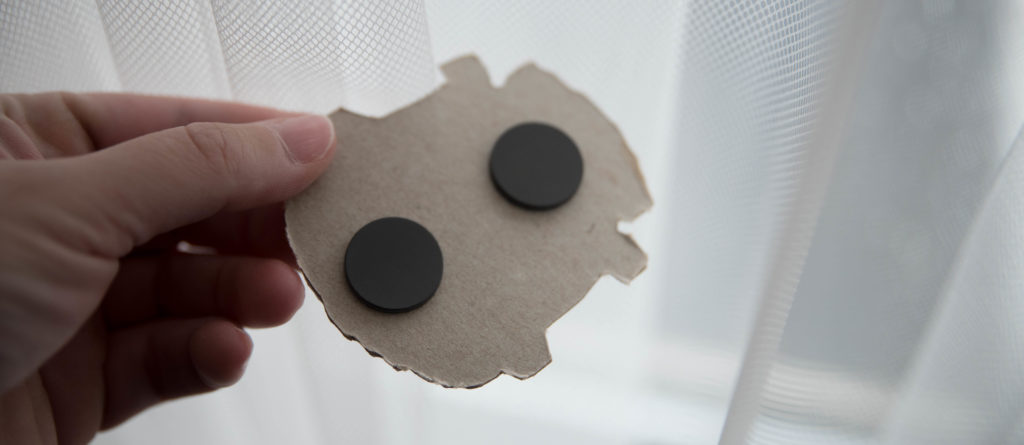
Now, you’re simply going to add the magnet to the backside of your cardboard-supported sticker.
I’m lazy, and I purchased magnets that had an adhesive back to make this as fast as possible, but you could use regular magnets and your own adhesive.
I recommend a magnet with a bit of strength to it and a good adhesive. Cardboard isn’t as light as paper, and the adhesive going to have to hold the cardboard while it’s free hanging on your fridge. If this is an appliance you access often, it will get a lot movement, and it might bang against the wall or another person.
My BDSM magnets have been going for over 3 years now with no issues (with the magnet sheet above), so definitely err on the side of “better quality” for the final magnets and adhesive.
I use one magnet, in the center, for all of my smaller BDSM stickers, but you could use as many as you’d like. The largest of my stickers ended up getting four magnets at all four corners to help support it when it’s on the fridge.
It’s up to your preferences and how many magnets you have.
Nailed it! You’ve Made Your Own BDSM Magnets
That’s it! You’re done. I’d allow the adhesive on the magnets to dry for a day or two before putting them on the frontlines of battling gravity on your fridge, but you’re good to go.
You now have magical BDSM magnets to hang – which makes a great option for someone who has a ton of kinky stickers and no idea where to put them!
Thanks for reading how to make your own BDSM magnets!

